Androidアプリケーションの開発 【02:Button アプリ】
簡単なButtonアプリの作成
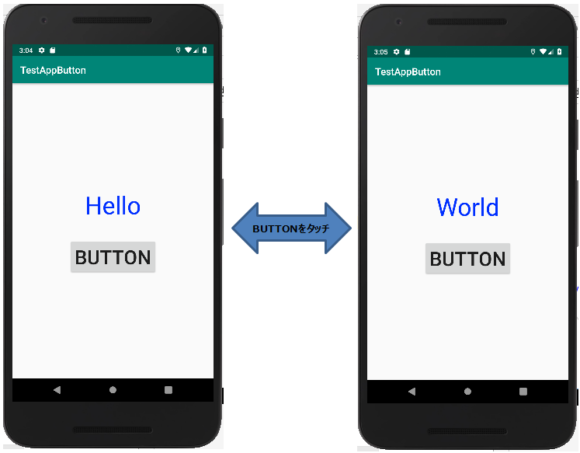
ボタンを押したら文字が変わるという簡単なアプリを作ってみます。
Android プロジェクトの作成
Buttonアプリを作るためにプロジェクトを作成します。
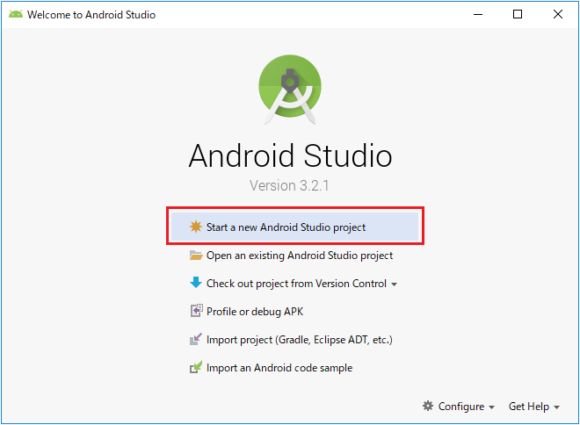
Android Studio から一番上の「Start a new Android Studio project」を選択します。
あるいは既にプロジェクトが表示されているのであれば、「ファイル」「新規」「新規プロジェクト…」
を選択して新規プロジェクトを開始できます。
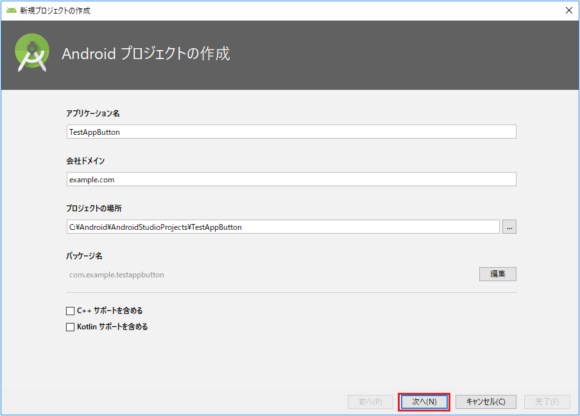
アプリケーションの名前、保存場所などを設定します。
- アプリケーション名: TestAppButton
- 会社ドメイン: example.com
テストなのでデフォルト名を使います。但しリリースするときはユニークなものにしないといけません。
- プロジェクトの場所: アプリプロジェクトを保存する場所
デフォルトのまま、あるいはフォルダ名がアルファベットであればどこにでも作れます(日本語のフォルダ名はダメです)。
…\AndroidStudioProjects\TestAppButton
次へ(N)をクリックします。
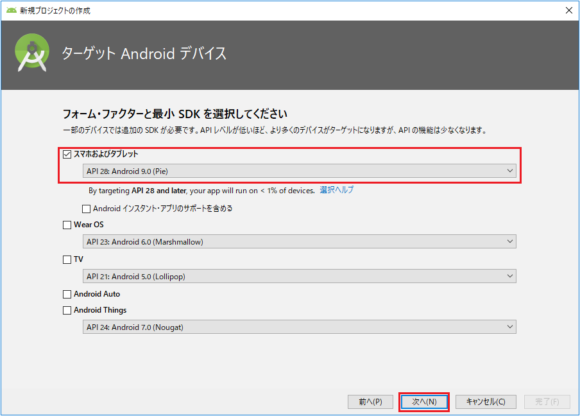
ターゲット Android デバイスの設定
ここでは開発するアプリのターゲットAPIを決めます。下の例では API 28: Android 9.0 (Pie)にしています。
次へ(N)をクリックします。
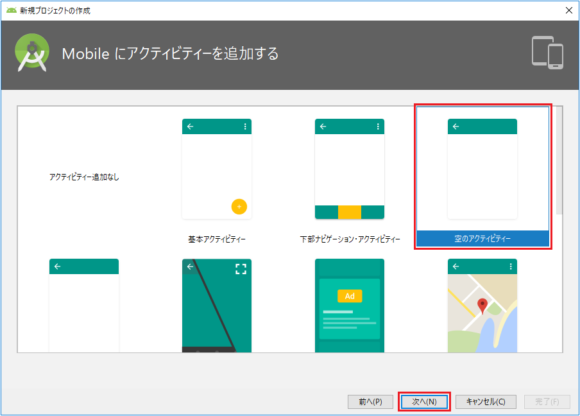
Mobile にアクティビティを追加する
使いやすい「空のアクティビティー」をセットします。デフォルトで空のアクティビティーが最初に選択されていると思います。
次へ(N)をクリックします。
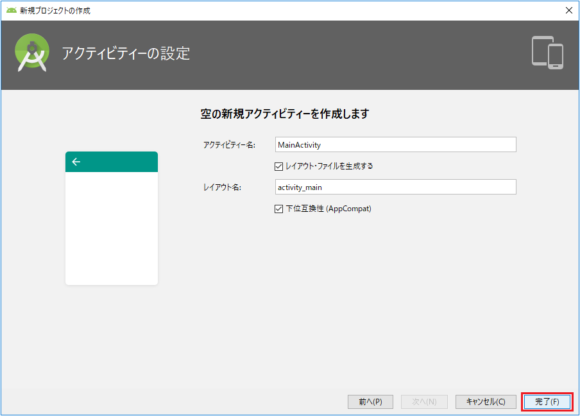
アクティビティー、レイアウトなどの名前を設定します。
ここはテストなのでデフォルトのままです。
- アクティビティー名: MainActivity
- レイアウト名: activity_main
完了(F)をクリックします。
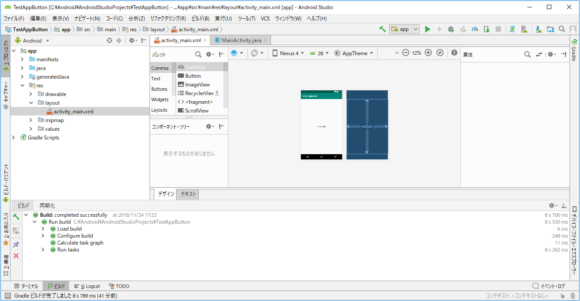
プロジェクトが完成しました。
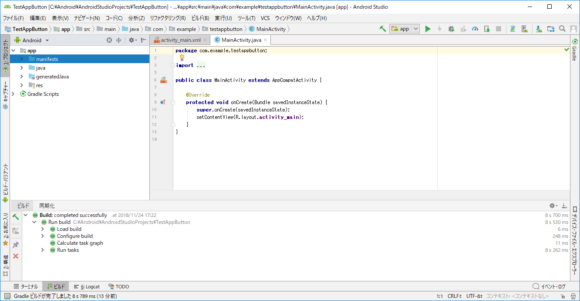
MainActivity
コードの記述をして行きます。
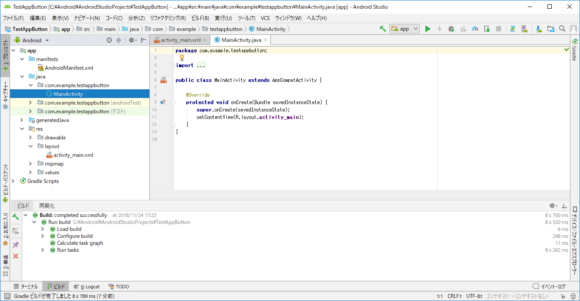
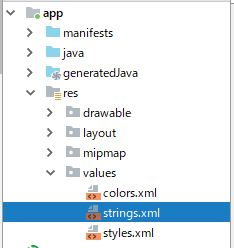
プロジェクトが作成されると「Project」のTAGで階層が表示されます。
主に MainActivity.java と activity_main.xml を使います。
Java のコーディングは MainActivity.java にします。
空のアクティビティーを選んだので、ある程度の基本的なコードは既に入っています。
package com.example.testappbutton;

import android.support.v7.app.AppCompatActivity;
import android.os.Bundle;

public class MainActivity extends AppCompatActivity {

    @Override
    protected void onCreate(Bundle savedInstanceState) {
        super.onCreate(savedInstanceState);
        setContentView(R.layout.activity_main);
    }
}
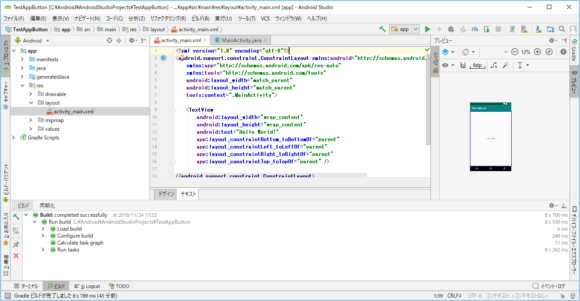
activity_main.xml にはレイアウトを記述します。
やり方として2通りあります。
- 「デザイン」を使って画面上にUIパーツを配置する方法
- 「テキスト」で全てコードで書いていく方法
「デザイン」ではレイアウトの配置全体をデザイン的に決めていくには便利です。
「Text」のタブをクリックしてここにコードを書きます。
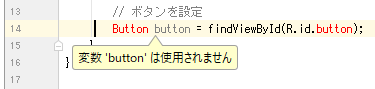
MainActivity.javaの onCreateメソッドにボタンを設定する記述をします。
@Override
protected void onCreate(Bundle savedInstanceState) {
    super.onCreate(savedInstanceState);
    setContentView(R.layout.activity_main);

    // ボタンを設定
    Button button = findViewById(R.id.button);
}
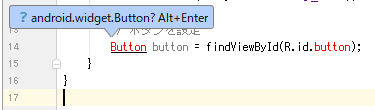
ここで、エラーが表示されますが後でコードを正しく追加すれば消えます。
エラーとなっているところにこのようポップアップが出た場合は、「Alt+Enter」を行うと自動的に以下の行が追加されます。
import android.widget.Button;
setContentView:
Screenにテキスト、ボタン、画像を表示させる仕組みで SetContentView() は最終的にViewをまとめるところです。
それぞれTextViewなどのViewを何種類かある Layout に設定し、それを SetContentView() に入れます。
setContentView(R.layout.activity_main);
findViewById:
これはリソースの(レイアウトファイル)からid が button のものを見つけてくることを意味します。
次に TextView を設定します。このケースではTextViewは事前に onCreate() の前に作成します。
private TextView textView;
onCreate() の中に
textView = findViewById(R.id.textView);
その後に、ボタンが押された事が分かるようにリスナー登録します。
// TextView の設定
textView = findViewById(R.id.text_view);
OnClickListener():
リスナー、アプリが起動中に、ユーザーがボタンをタップしたイベント発生を監視します。
button.setOnClickListener(new View.OnClickListener() {
    @Override
    public void onClick(View view) {
        // ...
    }
});
- trueなら「Hello」
- falseなら「World」
if (flag) {
    //textView.setText(R.string.hello);
    textView.setText("Hello");
    flag = false;
}
else {
    //textView.setText(R.string.world);
    textView.setText("World");
    flag = true;
}
MainActivity.java
package com.example.testappbutton;

        import android.support.v7.app.AppCompatActivity;
        import android.os.Bundle;
        import android.view.View;
        import android.widget.Button;
        import android.widget.TextView;

public class MainActivity extends AppCompatActivity {

    private TextView textView;
    private boolean flag = false;

    @Override
    protected void onCreate(Bundle savedInstanceState) {
        super.onCreate(savedInstanceState);
        setContentView(R.layout.activity_main);

        // ボタンを設定
        Button button = findViewById(R.id.button);

        // TextView の設定
        textView = findViewById(R.id.text_view);

        button.setOnClickListener(new View.OnClickListener() {
            @Override
            public void onClick(View view) {
                // flagがtrueの場合
                if (flag) {
                    textView.setText("Hello");
                    flag = false;
                }
                // flagがfalseの場合
                else {
                    textView.setText("World");
                    flag = true;
                }
            }
        });
    }
}
この状態ではまだエラーがありますがレイアウトファイルを設定すれば解消します。
activity_main
activity_main.xmlにレイアウトを設定します。
MainActivity.java では button と textView を呼び出していますのでそれをここに作成します。
デフォルトでは「ConstraintLayout」が設定されています。
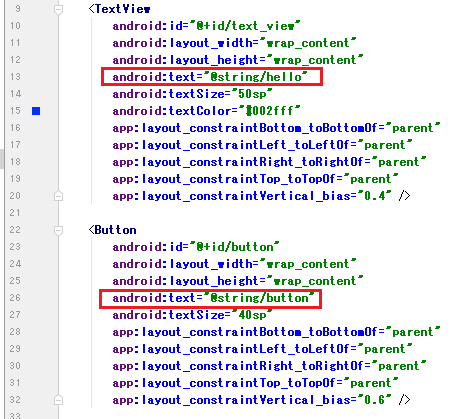
ボタンのIDは以下で定義されています。
android:id=”@+id/button”
TextViewも同様です。
android:id=”@+id/text_view”
またTextViewの垂直方向の位置調整で以下のように設定します。
app:layout_constraintVertical_bias=”0.4″
またButtonは
app:layout_constraintVertical_bias=”0.6″
テキストのサイズと色を設定します。
android:textSize="50sp"
android:textColor="#002fff"
Buttonは
android:textSize="40sp"
activity_main.xml
<?xml version="1.0" encoding="utf-8"?>
<android.support.constraint.ConstraintLayout xmlns:android="http://schemas.android.com/apk/res/android"
xmlns:app="http://schemas.android.com/apk/res-auto"
xmlns:tools="http://schemas.android.com/tools"
android:layout_width="match_parent"
android:layout_height="match_parent"
tools:context=".MainActivity">

<TextView
android:id="@+id/text_view"
android:layout_width="wrap_content"
android:layout_height="wrap_content"
android:text="Hello"
android:textSize="50sp"
android:textColor="#002fff"
app:layout_constraintBottom_toBottomOf="parent"
app:layout_constraintLeft_toLeftOf="parent"
app:layout_constraintRight_toRightOf="parent"
app:layout_constraintTop_toTopOf="parent"
app:layout_constraintVertical_bias="0.4" >

<Button
android:id="@+id/button"
android:layout_width="wrap_content"
android:layout_height="wrap_content"
android:text="Button"
android:textSize="40sp"
app:layout_constraintBottom_toBottomOf="parent"
app:layout_constraintLeft_toLeftOf="parent"
app:layout_constraintRight_toRightOf="parent"
app:layout_constraintTop_toTopOf="parent"
app:layout_constraintVertical_bias="0.6" >

</android.support.constraint.ConstraintLayout>
リテラルの修正
コードをよく見るとあちこちにワーニングが出ています。
黄色いバックグラウンドになっているところにマウスを持ってくると、下記のように表示されます。

String literal in setText can not be translated. Use Android resources instead.
と記載されてます。
setTex(“Hello”) のようにHelloという文字列をハードコードで直書きしているリテラルが、
正しく解釈されないのでresourceを使うようにと注意されています。
例えば日本語でハードコーディングすると文字化けやコードが走らない事があり得るのです。
修正は下記の通りです。
textView.setText(R.string.hello);
上記の res\values\strings.xml に
nameが”hello”というkeyに対してHelloというvalueを設定します。
このワーニングはactivity_main.xmlのリテラルにも出ているので合わせて修正します。
strings.xml
<resources>
<string name="app_name">TestAppButton</string>
<string name="hello">Hello</string>
<string name="world">World</string>
<string name="button>Button</string>
</resources>
それぞれの修正箇所です。
MainActivity.java

activity_main.xml
以上でコードの記述は完成です。
アプリケーションを実行
メニューから「実行(U)」->「実行(U) ‘app’」とするか、
メニュー下の三角のアイコンをクリックして実行するとビルドが始まります。
![]()
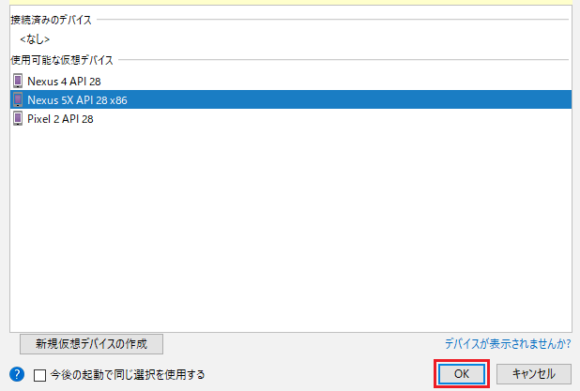
ビルドが成功すると実行デバイスの選択になります。
エミュレーターを選択し、OKをクリックします。
エミュレータが起動して画面 が表示されます。
「BUTTON」をタッチすると表示が切替ります。